The first step in creating a new order is to place the order. On the Place Order page, you can define the Pick Up and Delivery addresses. You can also define References and a service level for the shipment.
Follow the steps in the sections below to place an order.
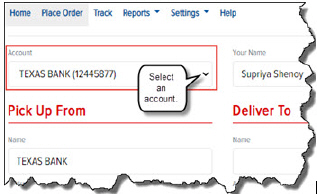
To select an account:
· On the Place Order page, in the Account field, click the drop-down arrow and select the account for which you want to place an order, as shown:
You can enter contact information (name, telephone, and extension) for an order.
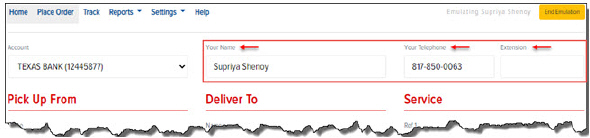
To enter contact information:
In the Your Name field, type your first and last name.
In the Your Telephone field, type your telephone number.
In the Extension field, type your telephone extension.
In the Pick Up From section, you can enter the details of the pickup stop (the stop where the shipment is going to be picked up).
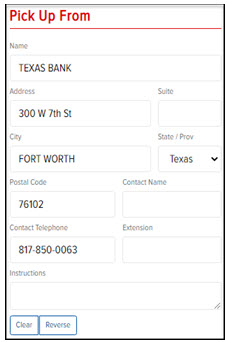
To define fields in the Pick Up From section:
(Required) In the Name field, enter a partial or full name. (Or, type “*” to display all the names defined in the Address Book). A list of names displays. Select the desired name from the list.
(Required) In the Address field, enter a partial or full address. (Or, type “*” to display all the addresses defined in the Address Book). A list of addresses displays. Select the desired address from the list.
(Optional) In the Suite field, type a Suite #.
(Required) In the City field, type the name of the city.
(Required) In the State field, click the drop-down arrow and select a state.
(Required) In the Postal Code field, type a postal code.
Note: After you enter the complete address, the system will automatically validate the address. A validated address is displayed in green. An un-validated address is displayed in red. You can edit an un-validated address, and attempt to re-validate it.
(Optional) In the Contact Name field, type a Contact Name.
(Optional) In the Contact Telephone field, type a telephone number.
(Optional) In the Extension field, type an extension (if applicable).
(Optional) In the Instructions field, type any instructions for the pickup (maximum of 250 characters).
Note: To clear the address that is displayed in the Pick Up From section, click Clear.
Note: If you want to swap all of the information in the Pick Up From section with the information in the Deliver To section, click Reverse.
Note: To save the Pick Up address to the Address Book, click the Save to Address Book button. This button does not display if you have previously saved the Pickup Address to the Address Book.
In the Deliver To section, you can enter the details of the delivery stop (the stop where the shipment is going to be delivered.
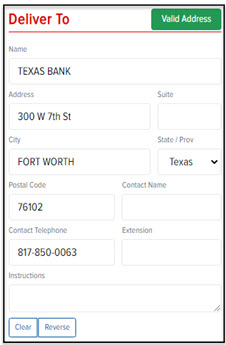
To define fields in the Deliver To section:
(Required) In the Name field, enter a partial or full name. (Or, type “*” to display all the names defined in the Address Book). A list of names displays. Select the desired name from the list.
(Required) In the Address field, enter a partial or full address. (Or, type “*” to display all the addresses defined in the Address Book). A list of addresses displays. Select the desired address from the list.
(Optional) In the Suite field, type a Suite #.
(Required) In the City field, type the name of the city.
(Required) In the State field, click the drop-down arrow and select a state.
(Required) In the Postal Code field, type a postal code.
Note: After you enter the complete address, the system will automatically validate the address. A validated address is displayed in green. An un-validated address is displayed in red. You can edit an un-validated address, and the system will attempt to re-validate it.
(Optional) In the Contact Name field, type a Contact Name.
(Optional) In the Contact Telephone field, type a telephone number.
(Optional) In the Extension field, type an extension (if applicable).
(Optional) In the Instructions field, type any instructions for the pickup (maximum of 250 characters).
Note: To clear the address that is displayed in the Pick Up From section, click Clear.
Note: If you want to swap all of the information in the Deliver To section with the information in the Pick Up From section, click Reverse.
Note: To save the Pick Up address to the Address Book, click the Save to Address Book button. This button does not display if you have previously saved the Pickup Address to the Address Book.
In the Service section, you can define Reference Codes, goods (including pieces, weight, units, dollar value), Pick Up Date, Service, Vehicle, and Hazardous Materials.
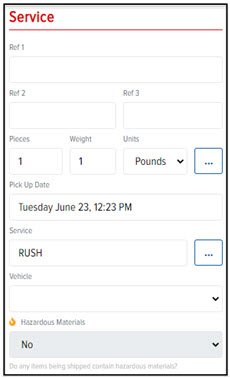
To define fields in the Service section:
(Required) In the Ref 1 field, type a Reference Code.
(Optional) In the Ref 2 field, type a Reference Code.
(Optional) In the Ref 3 field, type a Reference Code.
Click the ![]() icon next to the Units
field, as shown:
icon next to the Units
field, as shown:
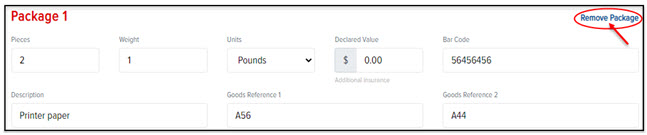
The Package page appears, as shown:
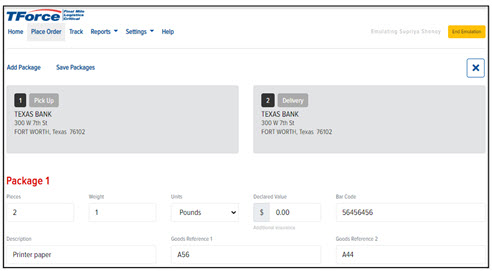
In the Package 1 section, in the Pieces field, type the number of pieces in the order.
In the Weight field, enter the weight of the pieces.
In the Units field, click the drop-down arrow, and select Pounds or Kilograms.
(Optional) In the Declared Value field, enter the dollar amount of the package.
(Optional) In the Bar Code field, enter a barcode number.
(Optional) In the Description field, enter a description of the package.
(Optional) In the Goods Reference 1 field, enter a goods reference #.
(Optional) In the Goods Reference 2 field, enter a goods reference #.
(Optional) Click Save Packages, as shown:
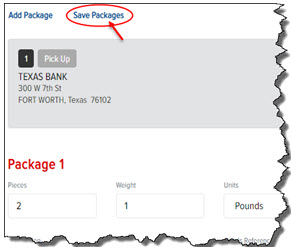
To add additional packages, click the Add Package link, and repeat steps 4-13.
To remove a package from the order, click the Remove Package link, as shown:
Click the ![]() icon to return to the Place
Order page.
icon to return to the Place
Order page.
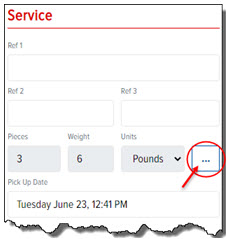
Note: On the Place Order page, in the Service section, the Pieces, Weight, and Units fields are automatically populated and reflect the total pieces, weight, and units defined for the order.
(Optional) Click in the Pick Up Date field to display a calendar. Click the date that you want to have the shipment picked up. Note: You can define a date up to 60 days in the future. Note: If you do not define a date, the order is ready for pickup as soon as you place the order.
Click in the Service field. The Service page appears, as shown:
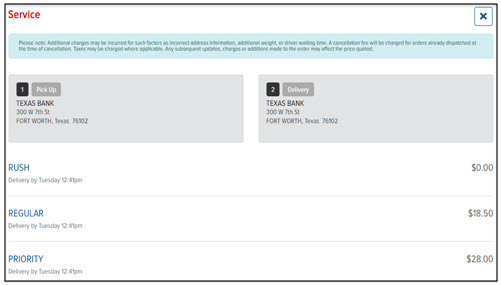
Click the desired level of service for the shipment. The Place Order page appears. The service that you selected is displayed in the Service section > Service field, as shown:
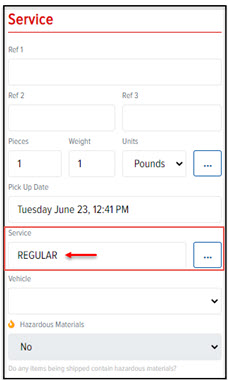
In the Vehicle field, click the drop-down arrow, and select a vehicle.
In the Hazardous Materials field, click the drop-down arrow, and select Yes if the shipped items contain hazardous materials. Select No if they do not.
Go to Step 2: Return Service/Additional Insurance/Notifications/Price Quote